Showing posts with label journals. Show all posts

Wednesday, September 12, 2012

SGSG 1

Make Your Own Travel Journal

Keeping a journal while you're travelling is a great way to capture your thoughts and adventures to enjoy once you're back home. You can even leave spaces to stick in your travel photos to make the journal complete.

Finding time to write while you're on the go is a challenge. These tips will help you to journal successfully.

The Pages
Collect coloured papers, used envelopes, inspiring quotes, birthday cards, magazine clippings, and anything else that makes you happy. The pages don't even need to be the same size. 

Smaller pieces can be glued onto larger ones or be used as tabs/dividers.
green page

Cover
You don't have to have a hard cover on your journal. It could be soft-covered like a paperback novel or magazine. Here's some ideas:
  • Use cardboard from a cereal box. Then cover it with wrapping paper/contact/sheet music/a poster/painted paper/stickers... anything!
  • Wrap your journal in nice fabric from an old scarf or skirt instead of a cover.
  • Make a simple drawstring bag for your journal.
Sketch books
Contents
Your journal: Your rules. You can have anything in it you want! Photos of loved ones and pets. Pages to draw on. Pages for writing. Envelopes are always great for storing ticket stubs and other memorabilia.

The power of watercolours...
Add interest to white pages with splashes of watercolour washes. Pick two or three colours for a page and use sparingly. Let the colours run together in some places, then leave flat to dry.

Pre-filling Pages
I often struggle to get time to sit and write when travelling because I'm off trying to cram a thousand things into each day! So I make forms on some of the pages before I leave. That way I can fill out a form, so that I'm sure to capture the important details of the day whenever I can grab a short window of time.  

Here's some examples. You're welcome to download these and use in your next journal!


[Click on each image to load the full size version, then right click and save as. You can then print out at whatever size you like.]

Binding Ideas
You can be really creative here. Anything goes. It doesn't have to be uber professional, just functional. Here are some options for joining your pages together:
  • Use staples (you can even get coloured ones!) or brads/split pins.
  • Use a hole punch, punching a few pages at a time. Make two, three or more holes along the spine and then tie a string or ribbon through each hole.
  • Borrow the heat binder from work/TAFE/Uni.
  • Borrow the ring binder from work/TAFE/Uni. Or even just use it to punch the holes, then get crazy with those friendship band skills you developed in Primary School and thought you'd never use again. Weave and knot the pages together.
  • Buy an awl (They're $2 from Spotlight) to poke holes through your pages and then stitch the pages together.
  • Punch one hole in the top of each page and slip onto an o ring binder


Wednesday, April 13, 2011

Sketchbook

I made a series of scrap/sketch books a number of weeks ago. The concept was one I'd seen demonstrated by Traci Bautista who does funky, urban inspired art and bookmaking. So I've taken a pile of photocopies of my work, along with coloured paper, watercolour paper and some b&w photocopies and bound them using my zutter bind-it-all. 
Sketch books
It's actually been really liberating. I made sure I had lots of colour and lots of different sized pages. So now when have an idea or want to draw something, I open up to a little page that is just the right size and off I go.  It has also enabled me to make it a work in progress and I've been sticking in things: yoga stickers, festival flyers, cider bottle labels, lyrics. fun!
Sketchbook page
Ocean inspired collage in the background. Sketch inspired by camping trips down south to Denmark, one of Maddie Joyce's camping adventures and, well, all this.
sketchbook page
Desert Lefts
Sketchbook page
Beach in My Backyard
Sketchbook page
Psychodelic 60s page - Sandtracks

Sunday, December 5, 2010

Surf Book

I started this little project before we went on holiday for three months. Then I came home, broke bones in both my arms and, finally, after another two and a half months I'm back at it.

It's almost finished now and I've really enjoyed the process. I've focused on incorporating more. More layers, more elements. Pushing my own limits. Plus giving myself permission to play and make mistakes. Pages are primed canvas. 6 x 7.5 inches.

It's funny where you find new inspiration. When I started surfing I didn't really consider the artistic side of it, but so many surfers are artists. When you're completely obsessed with the ocean it makes sense that you want to draw/paint/photograph it!
Surf Book - page 1
Surf Book - page 1b
Surf Book - page 2
Surf Book - page 3
Surf Book - Page 3a
Surf Book - page 4
Surf Book - page 5b
Surf Book - page 5a
Surf Book - page 6

Saturday, January 17, 2009

New Journal Finished

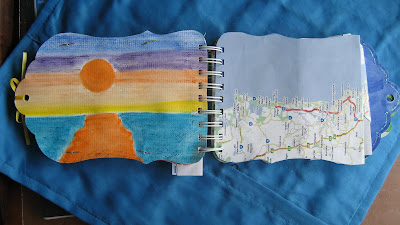
This is for my upcoming trip to Queensland. I have included places for photos, writing, recording our surf sessions and keeping goodies I find along the way.
I have yet to trim the transfers I did on silk. They'll go in here.
Maps so we know where to go :)
Pockets and places for goodies!
More transfers.

Thursday, December 18, 2008

Birthday presents and drawings!

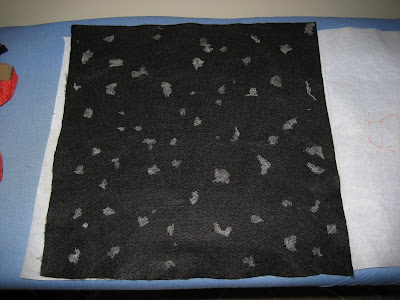
I've just made a present for a friend who's birthday is this weekend. I've done a bit of a tutorial, taking photos along the way...This is lying out bits of vlisofix on black felt. Laying out squares onto the felt.Ironed and ready to be stitched down properly. Stitched using straight stitch and metallic thread.Painted and stamped with puff paint, ready to be puffed. After puffing it with an iron, I painted the puff and any bare bits with black felt showing through. Then rubbed in treasure gold too. I painted some sticks and wound them with wire and beads. Cut my fabric into an arch shape and sewn it into my frame. I glued moulded, painted model magic in the centre and attached beads with wire off the bottom. Here's some of my drawings!